

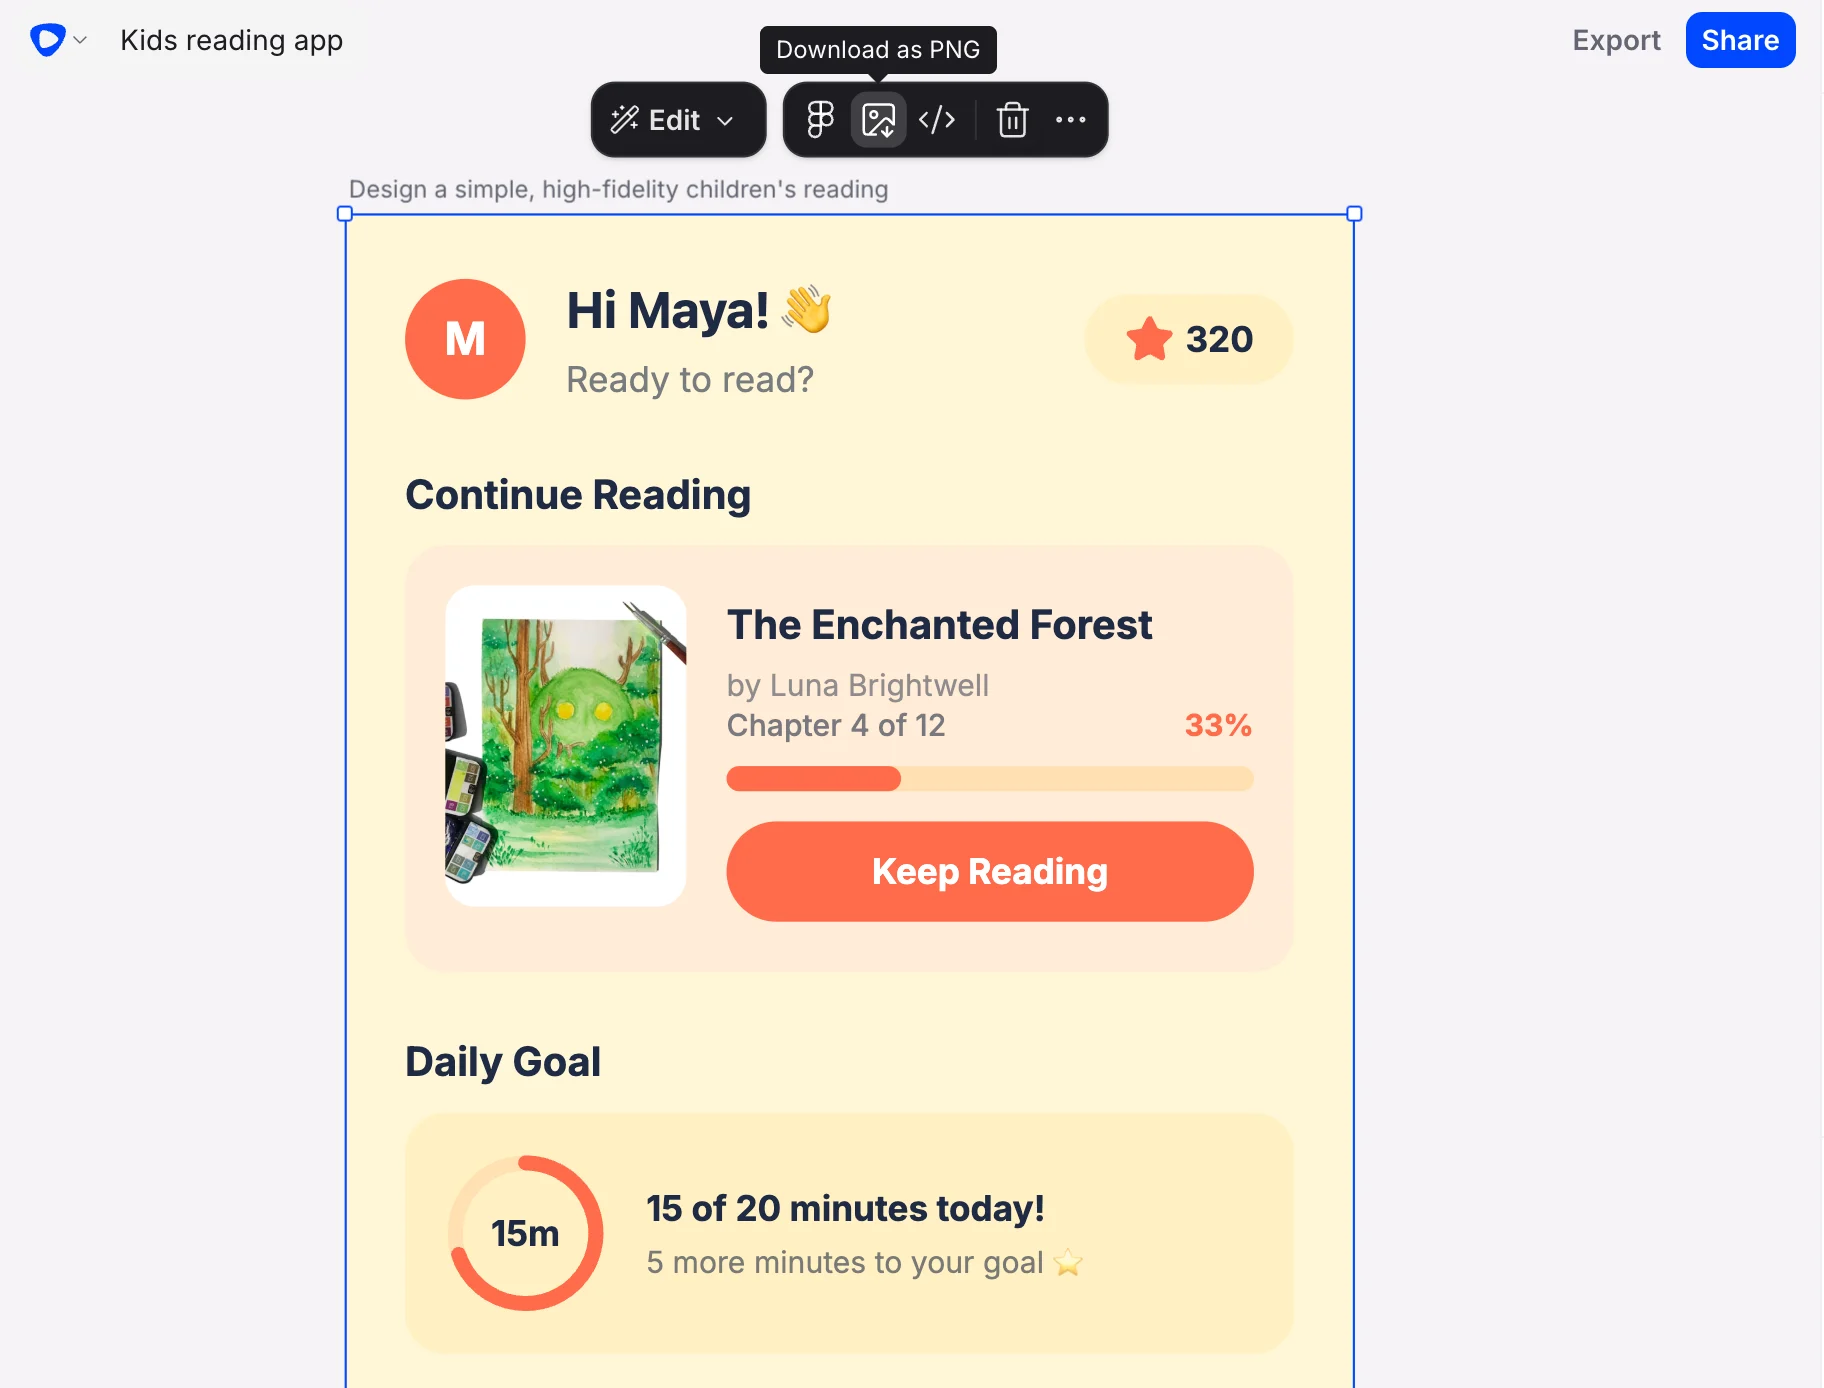
How to export your design
1
Open your design
Navigate to the design you want to export inside Flowstep.
2
Open the export menu
Locate the export option in the toolbar or design panel. Select it to open the export settings.
3
Choose your format
Select either JPG or PNG depending on your use case (see the comparison below).
4
Download the file
Confirm your selection and download the exported image to your device.
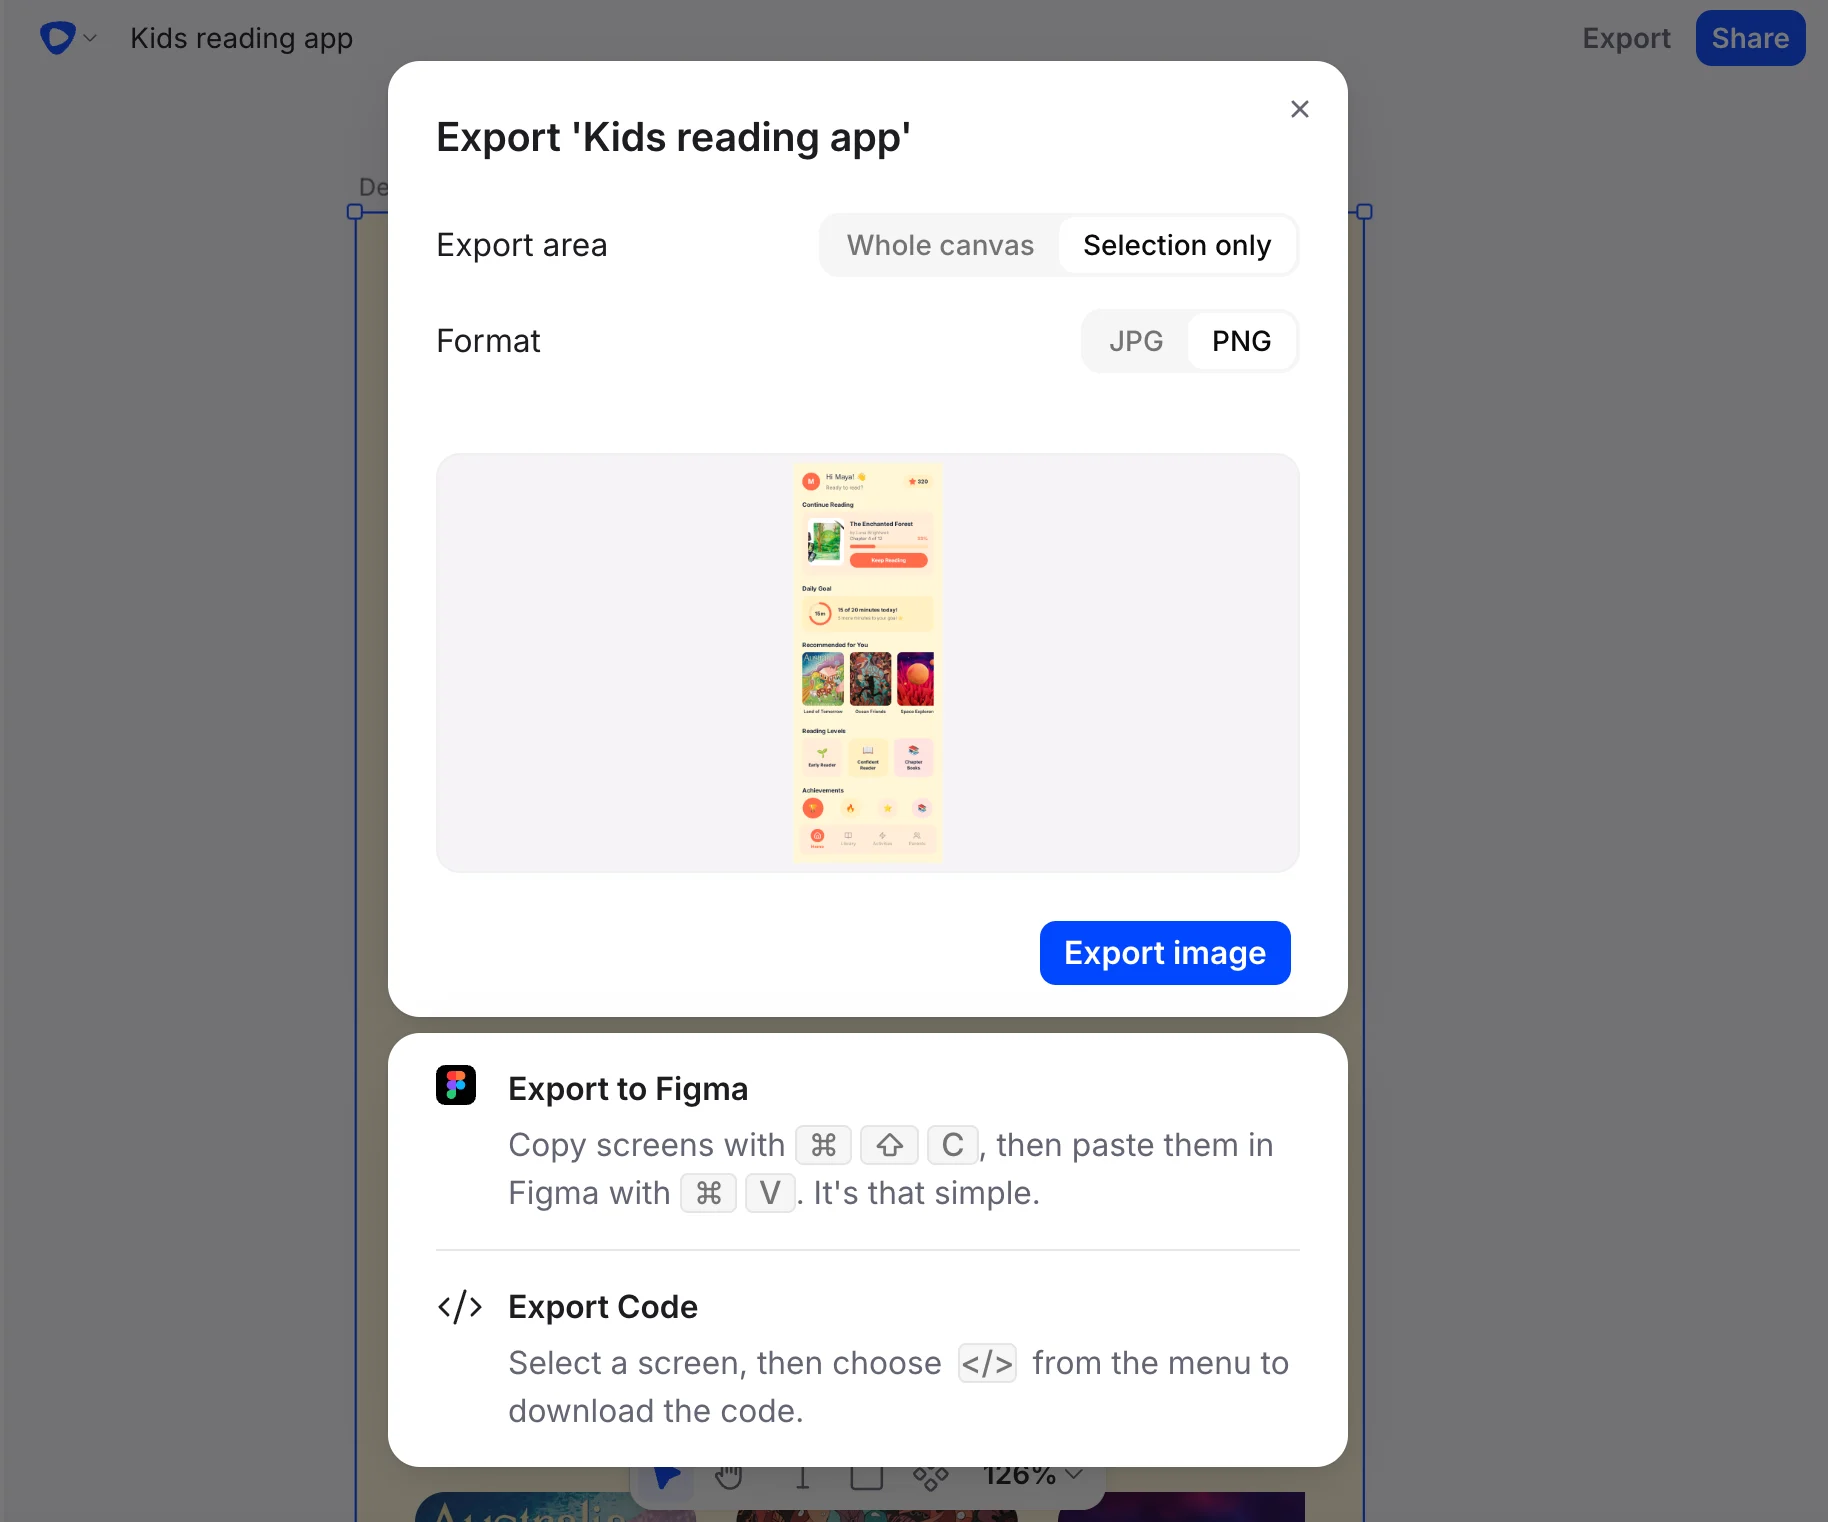
JPG vs PNG: which format should you use?
Export code
Beyond images, the Code button exports a screen as React + Tailwind code — copy a snippet, or download the full bundle as a ZIP. Bundles are self-contained: images used in the design (including ones you attached in the chat panel) are included in apublic/assets/ folder with the code referencing them by local path, so the export runs as-is.
Downloaded files — images and code bundles alike — are named after the screen they belong to (falling back to the file name if the screen is unnamed), which keeps exports easy to identify when you’re working with many screens.
If you need to take your design into a vector editing workflow, copy it directly into Figma instead. See Copy Flowstep designs into Figma instantly.